• The VOIDRUNNER'S CODEX is coming! Explore new worlds, fight oppressive empires, fend off fearsome aliens, and wield deadly psionics with this comprehensive boxed set expansion for 5E and A5E!

D&D General Maps, Maps, Maps! Dungeons, Ruins, Caverns, Temples, and more... aka Where Dyson Dumps His Maps.

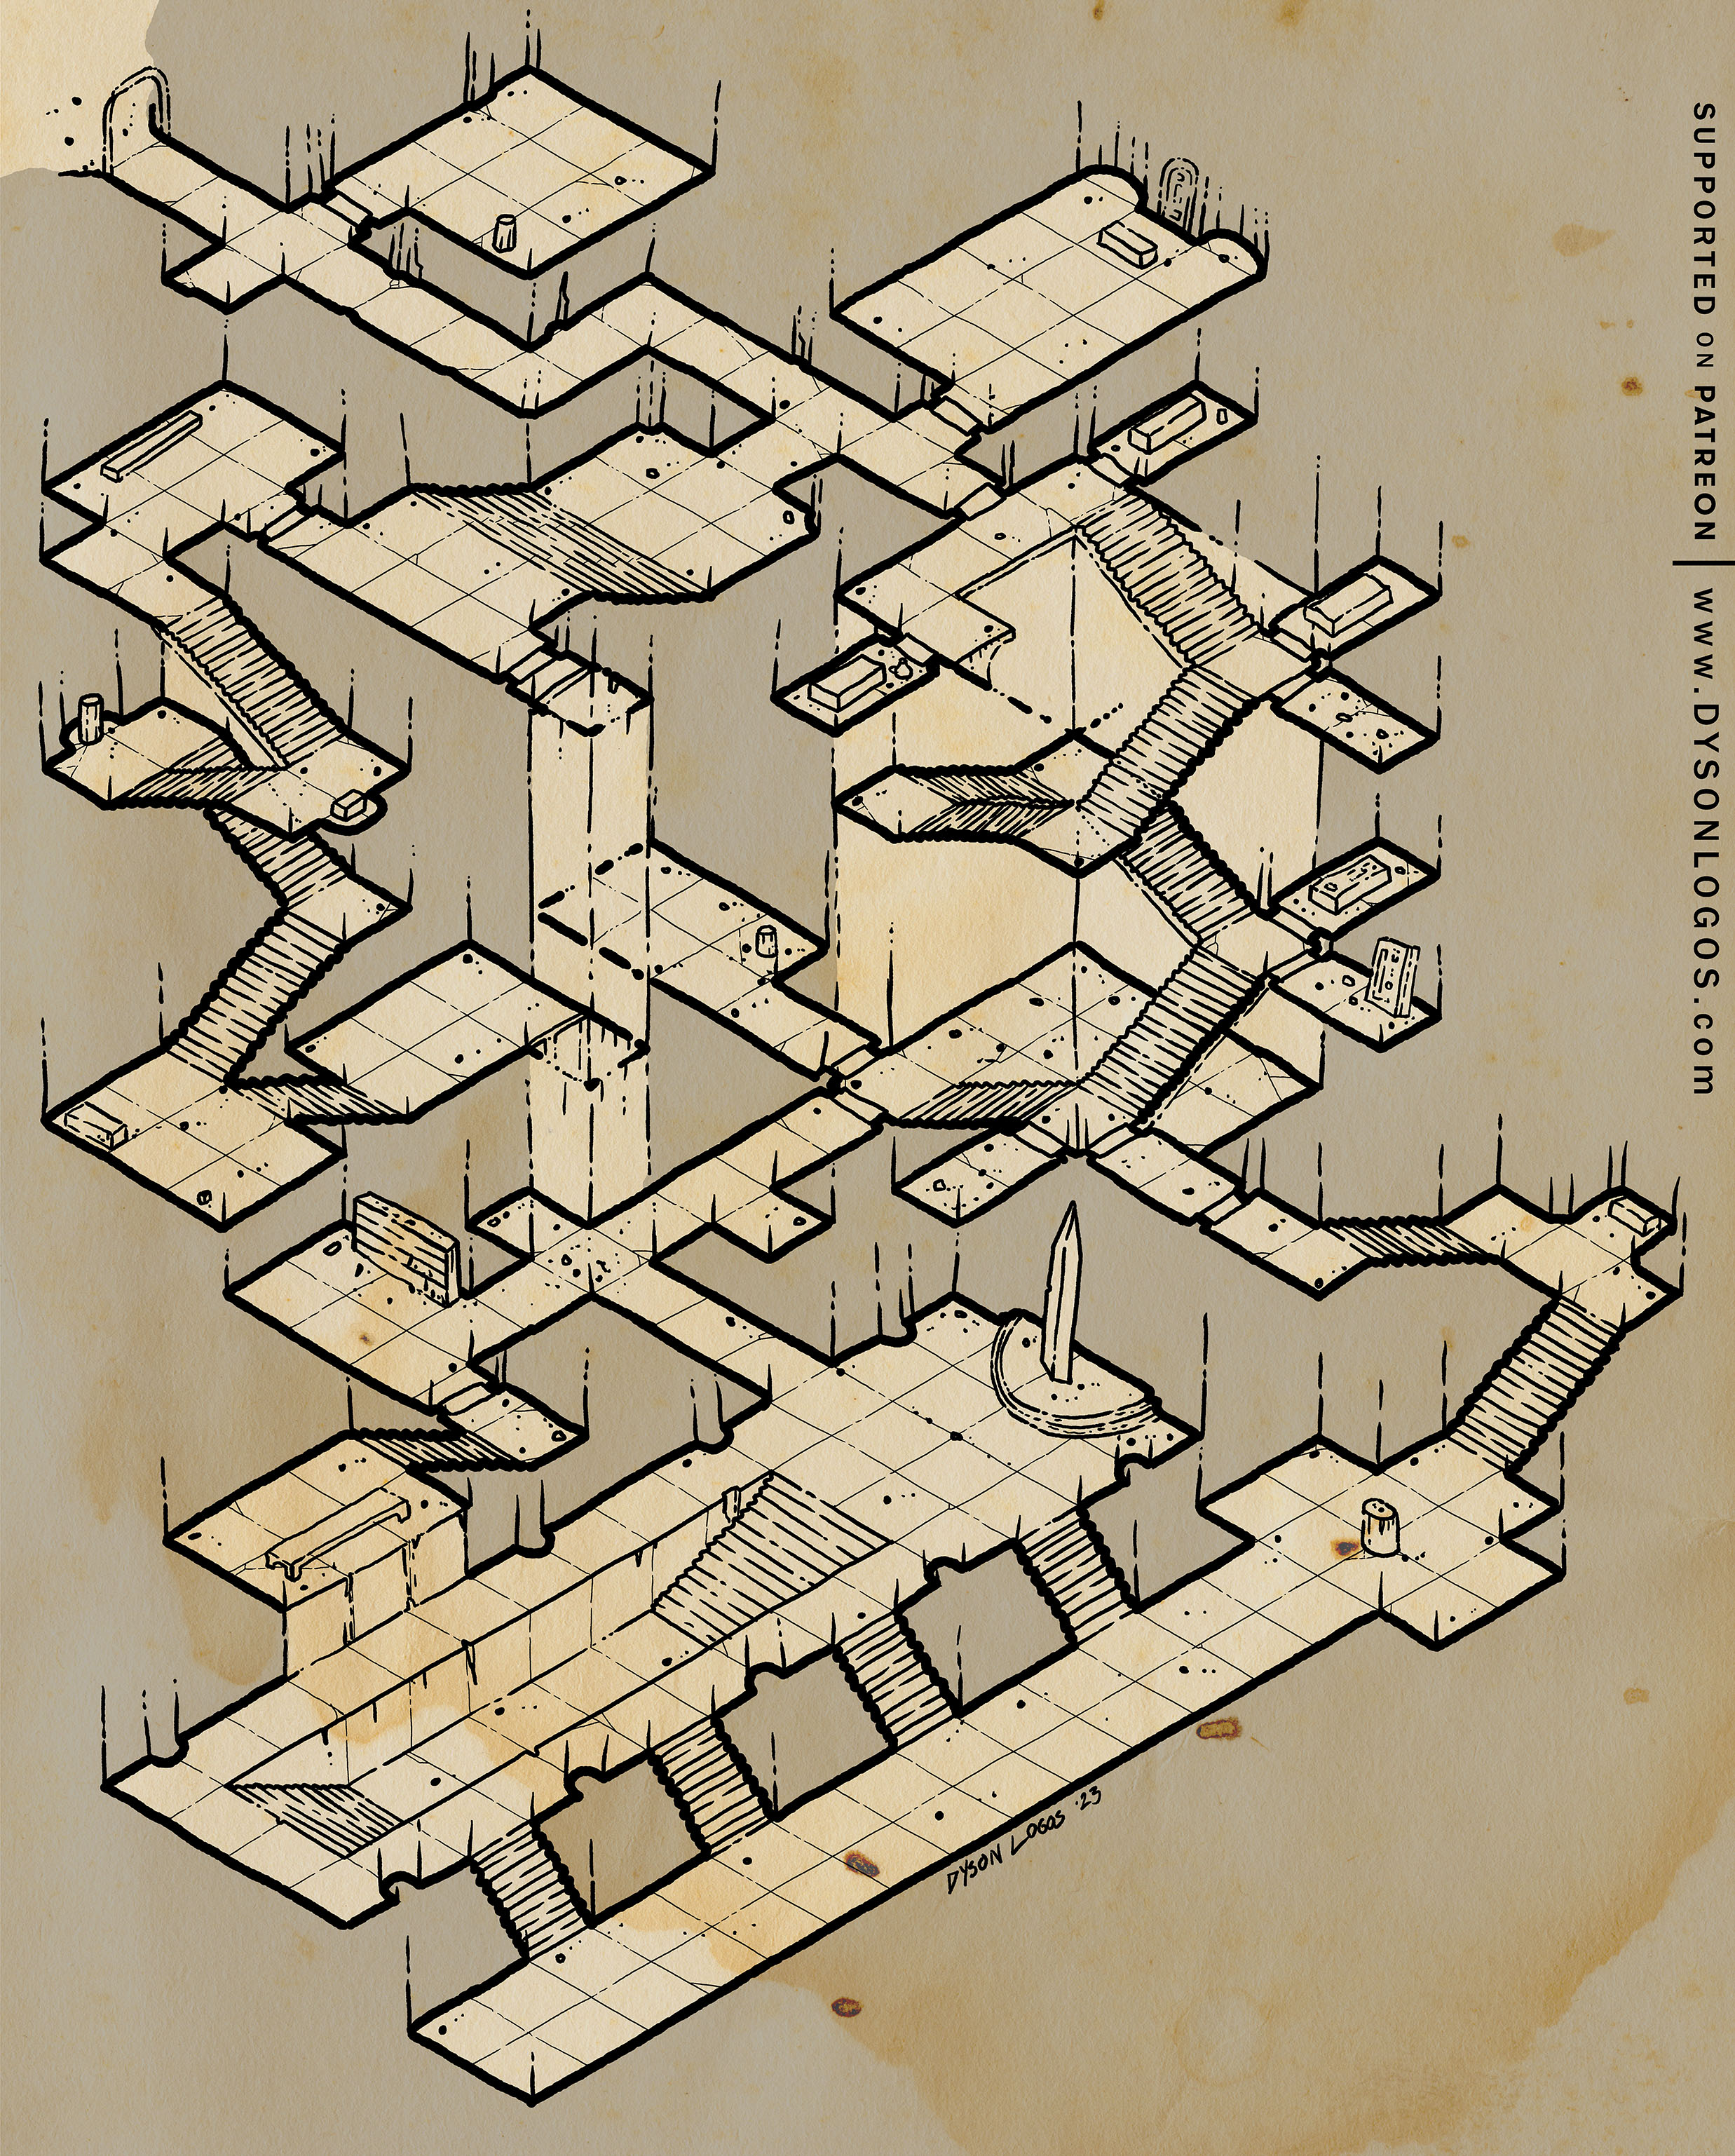
The Drurdelm Tombs

Drurdelm-Tombs.jpg


The Drurdelm Tombs were once well hidden but with the help of scrying magics they were uncovered about a hundred years ago and thoroughly looted by those unafraid of the Curse of the Drurdelm Sorceries. A curse that proved quite potent, killing the looters of a horrible magical wasting disease and somehow immune to both cure disease and remove curse. The sole survivor was a guide who touched none of the treasures found within, and who proceeded to sell many maps to the tombs over the next decade.

Now the Sages of Torment’s Watch have indicated that the Drurdelm Blade (the monolith in the shape of a sword in the great hall near the bottom of the tombs) is the tool required to sever the connection between a specific cursed artifact and the bearer of said. So the party must find one of the maps that lead here, and then descend to the Blade to make use of it, and refrain from collecting any of the remaining treasures along the way…


log in or register to remove this ad

Bolukbasti Grotto

24-inch-cave.jpg


Sitting on the rocky cliffside shore of Catspaw Lake, Bolukbasti Grotto is a twisting set of caves reached by stairs up the steep shores – stairs that have decayed and fallen to the erosion of the lakeshore. Exploring past the great cat den near the entrance to the caves, the main grotto (the long east-west cavern) has a ceiling height between 30 and 160 feet and a number of side caves and galleries, especially among the twisting smaller caves north of the main grotto.

Approaching the western end of the grotto, there are a pair of stone bridges that span over it about 20 feet above the grotto floor (if using 10′ squares). Further construction overlooks the grotto as we continue deeper westwards, as well as a sealed door into these areas on the south side of the cave. At one time the constructed areas were used by a court of shallow dwelling gnomes, but since then it has been home to a cult, bandits, and most recently as the staging area for an incursion of Githyanki seeking a lost silver sword.

The 1200 dpi versions of the map were drawn at a scale of 300 pixels per square and are 28,800 pixels (96 squares) wide. To use this with a VTT you would need to resize the squares to either 70 pixels (for 5′ squares) or 140 pixels (for the recommended 10 foot squares) – so resizing the image to 6,720 pixels or 13,440 pixels wide, respectively.


View attachment The -Tower-Between-Worlds-Collected.jpg
While I've been on the road, I've posted the following four maps - but didn't have the opportunity to crosspost them to ENWorld.

These are the four versions of the Tower Between Worlds - a strange tower that exists in many worlds, many places, many times. The Tower Between Worlds is a six-level spire in every version, but the interior (and often parts of the exterior also) can be quite different from each other. One element that each version of the tower has is the fifth level of the tower where the “tower shifting” mechanism is. On the fifth level (the upper left level on the map), there are four magical “tables” built into the wall, each with a small orb on it. Each corresponds to one of the versions of the tower and any attempt at picking up an orb immediately transports everyone on that level of the tower to the corresponding tower (and the orb remains where it was – they cannot actually be removed from their respective tables).

Each is in a different world and "biome", and some versions are in much better repair than others.

The four individual high-resolution maps are here: The Tower Between Worlds – Dyson's Dodecahedron
 

Weeping Dwarf Crag

Crying-Dwarf-Crag.jpg


Green copper bars prevent entry to the two ground-level entrances to this mountain temple except for those who can squeeze through a 16-inch by 16-inch space. Before the final portcullises, the streams run in masonry-built channels, but then run “free” and meander away from the structure for a few hundred yards before they rejoin and flow further down the mountains. The actual entrance to the structure is via a winding set of steps cut into the mountainside that leads up to the door on the top level.

The primary structure is built around a waterfall that descends from a magical water source embedded deep behind this area, and plummets past the middle level to land in the pool on the bottom level. Stairs lead down around the waterfall and eventually lead into the pool directly beneath it. The second level contains old libraries and less identifiable chambers, and the lowest level once contained a commemorative chamber for the ancestors of the builders, long neglected and now partially collapsed.

The 1200 dpi versions of the map were drawn at a scale of 300 pixels per square and are 7,200 pixels (24 squares) wide. To use this with a VTT you would need to resize the squares to either 70 pixels (for 5′ squares) or 140 pixels (for the suggested 10′ squares) – so resizing it to either 1,680 pixels wide or 3,360 pixels wide, respectively.


Fort Yaramuil

View attachment Fort-Yaramuil.jpg


This compact keep is essentially a small collection of towers, a small square keep, and a gatehouse linked by a few walls. The fully flagstoned yards and lack of stables indicate that horses are either kept outside the structure, or are not a major consideration in the region where the fort stands. The courtyards are tiered (as is the entrance through the postern door) with stairs, further giving advantage to defenders… as long as the enemies cannot fly or burrow…

The fort is three levels tall with two dungeon levels. The main structures are the rectangular gatehouse and keep. The dungeons include a large cistern and some cells on the lowest level, and behind the cistern is an emergency escape tunnel. The upper level of the dungeons is mostly storage now, but once included barracks when a larger picket force was required here.

The 1200 dpi versions of the map were drawn at a scale of 300 pixels per square and are 19,200 pixels (64 squares) wide. To use this with a VTT you would need to resize the squares to either 70 pixels (for 5′ squares) or 140 pixels (for the suggested 10′ squares) – so resizing it to either 4,480 pixels wide or 8,960 pixels wide, respectively.


The Halls of Lost Heroes

The-Halls-of-Lost-Heroes.jpg


This old tomb in the Ghost Hills Range was long ago buried when the main entrance collapsed. In more recent times, the side of the hill has slid away in a series of small landslides that breached one of the tombs. From there, the portal to the tomb was broken open, and the entire complex was opened to invaders and treasure hunters.

The structures on the right were the mausoleum, with grand pillared halls, raised daises for sarcophagi, and a grand dais in the largest room where the body of some major chieftain or noble was laid to rest.

South of (and below) the circular tomb that has become the entrance to the halls are the deeper sepulchres - and finally a very well-looted and slowly collapsing treasure chamber at the bottom.

Bringing adventurers to this site are the many inscriptions on the walls and crypts - many have survived the ages and the depredations of treasure hunters and contain notes on lineages and land ownership and a lot of other boring stuff (“Seriously, tax laws? This guy was sealed in a tomb decorated with TAX LAWS? No wonder he’s dead!”) - but in the mix are nonsense words and odd references to names of people or items - command words for lost artifacts, passwords for magical seals, and perhaps even the true names of ancient spirits that were enslaved to the mountain tribes.

The 1200 dpi versions of the map were drawn at a scale of 300 pixels per square and are 7,200 pixels (24 squares) wide. To use this with a VTT you would need to resize the squares to either 70 pixels (for 5′ squares) or 140 pixels (for the 10 foot squares indicated on the map) – so resizing the image to 1,680 pixels or 3,360 pixels wide, respectively.


Pitmann Manse

Pitmann-Manse.jpg


The Pitmann Manse is a large semi-fortified manse located in the heart of the Silentwood Forest. The manor is surrounded by tall trees and is situated on a hill overlooking the forest. The manor has been in the possession of the Pitmann family for generations.

The manor is a two-story building with a tower at one end that rises above the rest of the structure. The tower has a pointed roof and the windows at the top level are stained glass depictions of gargoyles that seem to be watching over the forest. The rest of the building has a dark stone exterior with intricate carvings and simpler stained glass windows.

Within, the walls are adorned with tapestries depicting scenes from the family’s history. The vaulted library that forms the east wing of the structure is two stories, although the mezzanine oddly cannot be accessed from the lower level of the library and is dedicated to the family history accompanied by paintings and busts of older members of the family, and even a statue of Lord Alexander Pittman, the man who commissioned the construction of the building.

The Pitmann family has a long and storied history. They were once one of the most powerful families in the region, but their fortunes have declined in recent years. The current head of the family is Lord William Pitmann, who inherited the manor from his father.

Lord William is an elderly man who spends most of his time in his study on the ground floor, pouring over ancient tomes and scrolls. He is rumoured to be searching for something, but no one knows what.

The Pitmann family has always been associated with magic, and many members of the family have been powerful wizards or sorcerers. However, there are also rumours that some members of the family have dabbled in darker forms of magic.

Despite their reputation, the Pitmanns were generally well-respected in the region. They were known for their generosity and have donated large sums of money to local charities over the years – although that has stopped with Lord William’s hermit-like habits and obsessive research…

The 1200 dpi versions of the map were drawn at a scale of 300 pixels per square and are 9,000 pixels (30 squares) wide. To use this with a VTT you would need to resize the squares to either 70 pixels (for 5′ squares) or 140 pixels (for 10‘ foot‘ squares) – so resizing the image to 2,100 pixels or 4,200 pixels wide, respectively.


Remove ads

Top